Download Joomla 3.0
The first step in installing Joomla 3.0 is to actually download it.
-
Run the Joomla 3.0 Installation Wizard
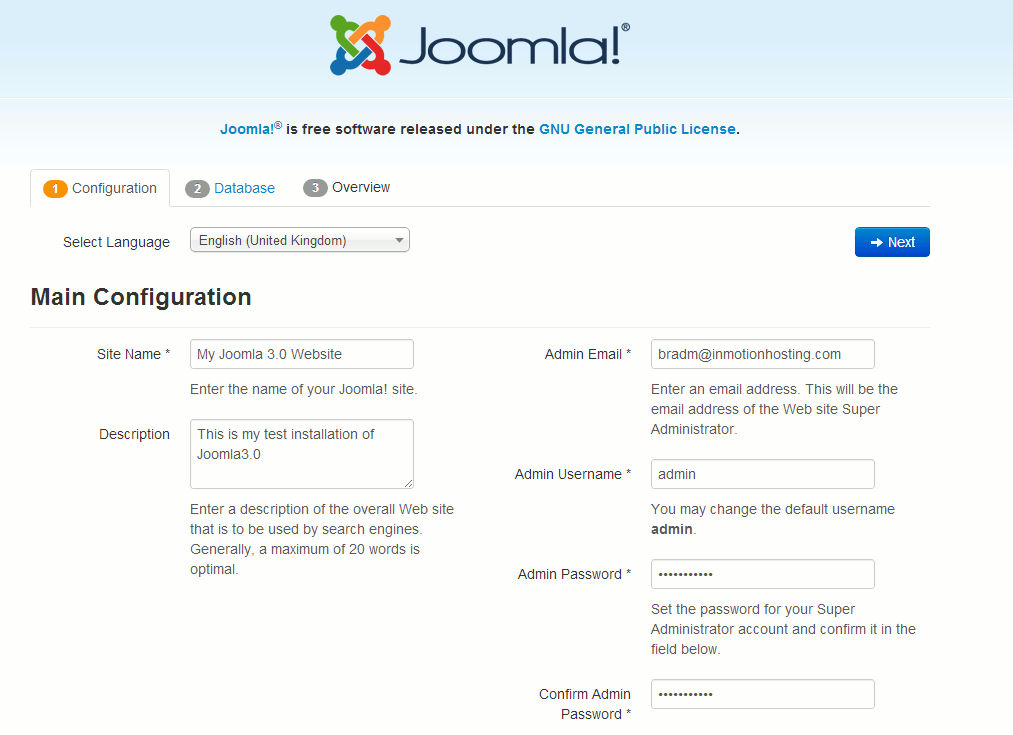
 1. Configuration
On the configuration page, you'll need to select your language, enter a name and description for your site, and setup your administrative details (such as username, password, and email address). Click the screenshot to the right to see how we filled out our configuration details. Click Next to continue the installation.
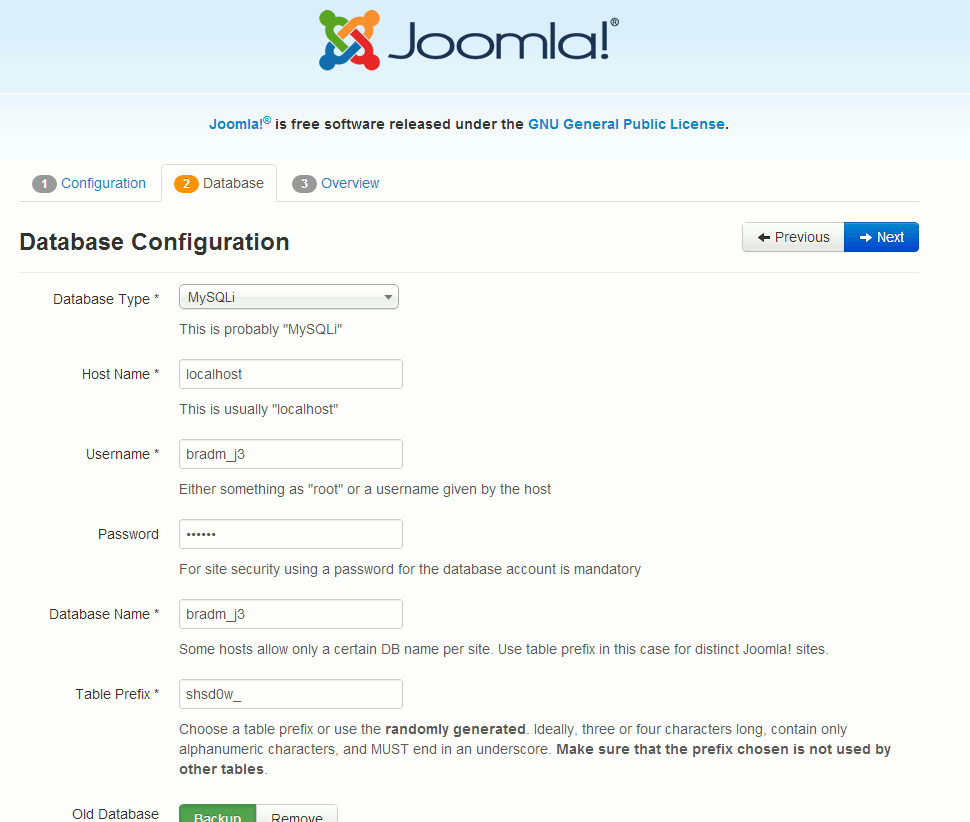
 2. Database
In step 2, you will configure Joomla with the database you setup in Step 3 above. On most servers, you can set the
Database Type to
MySQLi and set the
Host Name to
localhost. When finished entering your database credentials, click
Next.
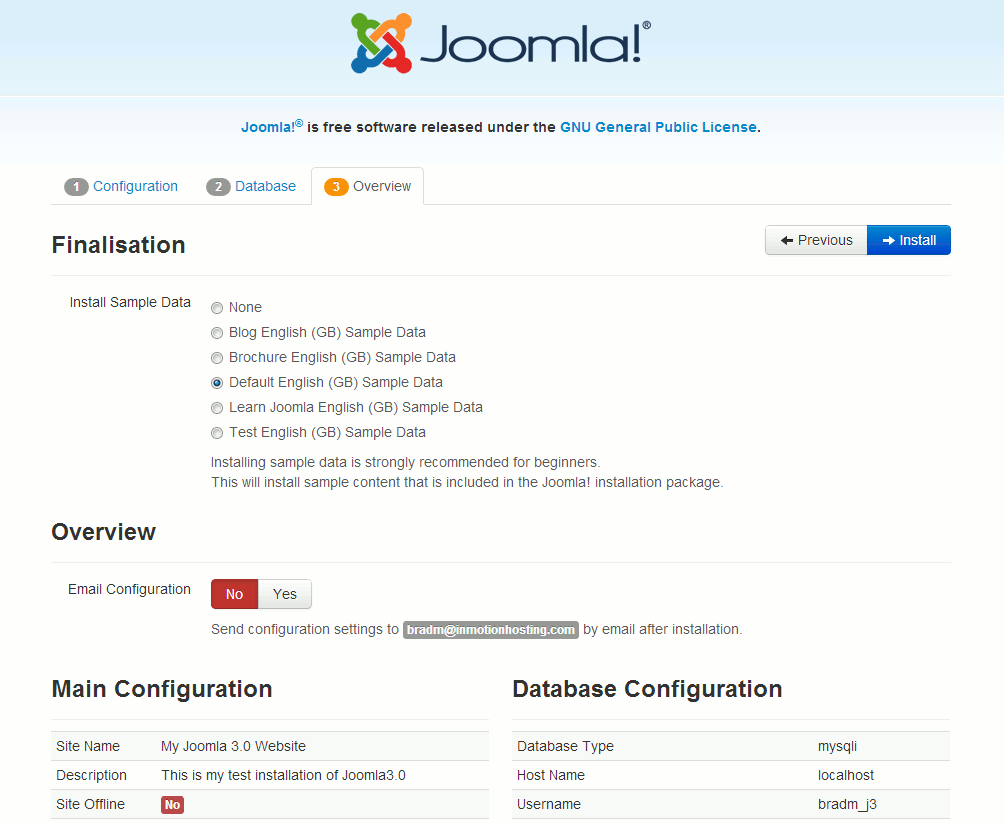
 3. Overview
If this is your first time using Joomla 3.0, you may want to use the option to
install sample data This will help you learn how Joomla 3.0 works because your new Joomla website will include sample articles. Also, You can select
Yes next to
Email Configuration if you want to have a copy of the installation details emailed to you. When finished with this page, click the
Install button.
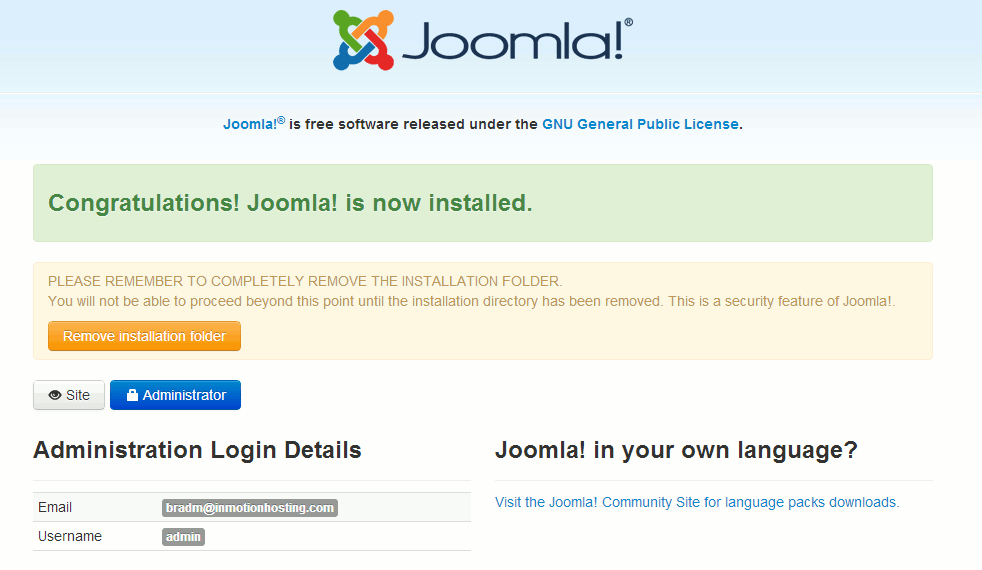
 You should then see a success message, stating that Joomla 3.0 has been successfully installed.
At this point, click the Remove installation folder button. Now that you have installed Joomla 3.0, and experience the joomla with writing new post.
 1. Configuration
 2. Database
 3. Overview
 You should then see a success message, stating that Joomla 3.0 has been successfully installed.
No comments:
Post a Comment